Earlier this year, Google began offering developer previews of Android 14 for folks who wanted a very preliminary look at what the next major release of Android has to offer. While those initial developer previews weren’t for the faint of heart, they were available for anyone to install — as long as you were willing to jump through a few hoops merely to risk running a very unstable release that could potentially brick your phone.
Thankfully, we’re now past that early preview period, and the first official Android 14 beta has arrived, making it much easier for anyone toting a compatible Pixel phone to try out Android 14 in advance of the final release later this year.
While the Android 14 developer previews needed to be installed over a wired connection from a PC, public Android 14 betas can be installed over the air (OTA), just like any other Android update. Still, don’t be fooled by this easy installation process — Android 14 is still beta software, and this is only the very first beta. While it’s unlikely to blow up your phone, at this early stage, you should still expect glitches, half-baked features, and other oddities.
In fact, unless you enjoy living on the edge, we’d recommend steering clear of installing it on any phone you depend on — especially right out of the gate like this. The new beta may be more easily available, but it’s still intended primarily to help developers get their apps ready. Most developers have secondary devices they can install betas on for testing purposes. Google makes it clear that these betas “may contain errors and defects that can affect the normal functioning of your device.”
This is only the first of what will be several betas over the next few weeks, and you can jump in at any time. Google also expects to reach “platform stability” by June, which is the stage where the betas should be more polished and stable as it moves closer to the final release.
Nevertheless, whether you want to forge ahead into the world of Android 14 betas today or further down the road, here’s how to go about it.

Joe Maring/Digital Trends
Confirm your phone is compatible with Android 14
Sorry, Samsung, OnePlus, or Motorola fans; whether it’s developer previews or public betas, Google only makes prerelease Android versions available for its Pixel phones. In this case, that’s the Pixel 4a 5G, Pixel 5, Pixel 5a, Pixel 6, Pixel 6 Pro, Pixel 6a, Pixel 7, and Pixel 7 Pro. Unless you have one of these phones to spare, you’re going to have to wait for the final Android 14 release later this year. Alternatively, you can try out Android 14 using Android Emulator found in the latest version of Android Studio, but that’s also intended mostly for developer testing, so that won’t be nearly as fun as running it on your phone.
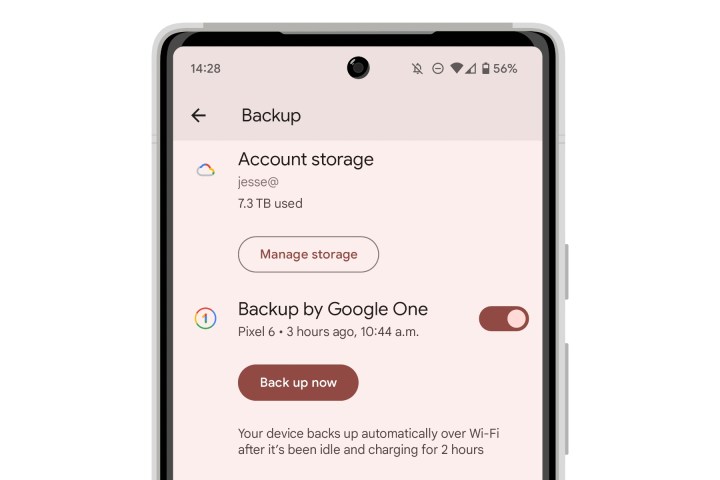
Back up your phone
It’s always a good idea to back up your phone before installing any major Android release, and that’s doubly true when working with beta releases. Since only Pixel phones are eligible for the Android 14 beta, your phone is likely already backing itself up to the cloud automatically. You can confirm this in our guide on how to back up your Android smartphone.
This backup is particularly important when installing the Android 14 beta, as there’s no easy way back to Android 13. If the beta isn’t working out for you, the only way you’ll be able to return to Android 13 is by wiping your phone entirely.
Also, as Google makes abundantly clear, you won’t be able to use a backup of the Android 14 beta once you go back to Android 13. In other words, if you go back to Android 13 and want to try the Android 14 beta again, you’ll need to start over from scratch.
Jesse Hollington / Digital Trends
Enroll in the Android beta program
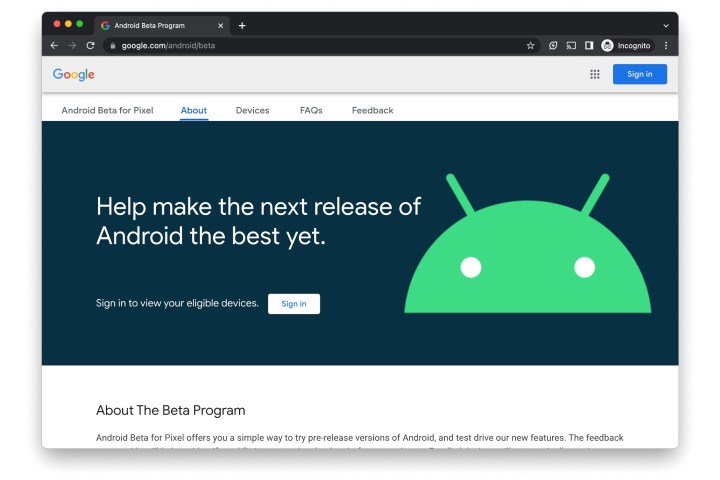
To begin receiving Android 14 betas over the air, you’ll need to enroll your device in the Android beta program. Note that Google doesn’t distinguish between Quarterly Platform Release (QPR) betas and major Android releases — it’s the same beta program for both. If you’re already enrolled for Android 13 QPR betas, the first Android 14 beta should already be waiting for you under software updates, so you can skip this section.
Step 1: Visit https://www.google.com/android/beta using a browser of your choice (preferably Chrome, but any modern browser should work).
Step 2: Select Sign In and sign in to the Google account used on your Pixel phone.
Step 3: Scroll down to the section for Your Eligible Devices.
Step 4: Select the blue Opt in button below the Pixel phone you would like to install the Android 14 beta onto.

Install the Android 14 beta over the air
Once your device is enrolled, this and future Android 14 betas will appear through the same over-the-air software process as other Android updates.
Step 1: Open the Settings app on your Pixel phone.
Step 2: Scroll down and select System.
Step 3: Select System update. You should see a Beta version of Android 14 appear as an available update.
Step 4: Select the Download & Install button.
The Android 14 beta will be downloaded and installed like any other Android software update. You can continue using your phone while this happens in the background; once it’s finished, your phone will reboot, and you’ll be running Android 14.
Andy Boxall/Digital Trends
How to prepare your phone to sideload Android 14
While enrolling your Pixel for automatic OTA updates is by far the easiest method to install the Android 14 beta, it’s not the only way to go. You can also opt for the old-fashioned way: using a computer and a USB cable. This could be handy if you’re having problems with the OTA update or if you simply don’t have a sufficient data connection to handle the 2GB download.
For security reasons, Pixel phones don’t normally allow updates to be installed over the USB port, so if you choose to go this route, you’ll need to prep your phone first.
Step 1: Open the Settings app on your Pixel.
Step 2: Scroll down and select About Phone.

Jesse Hollington / Digital Trends
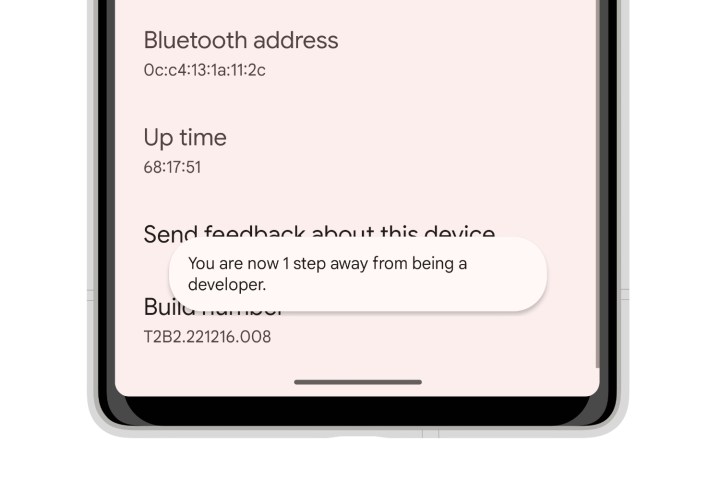
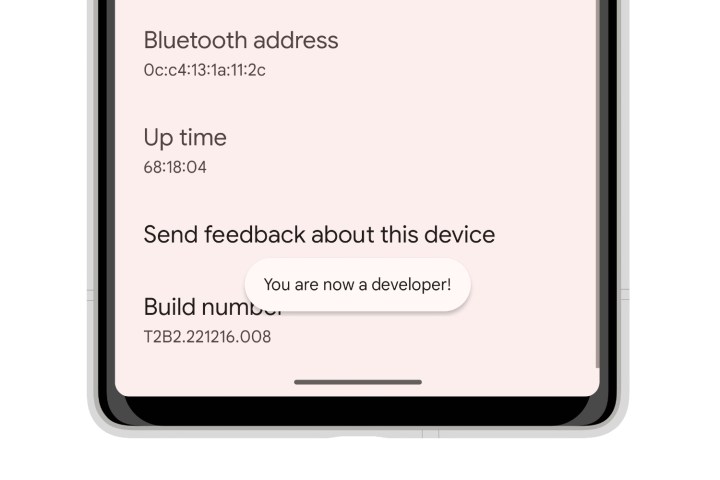
Step 3: Scroll down to the Build number at the bottom and tap it seven times. After you’ve selected it a few times, you should see a message pop up indicating that You are now x steps away from being a developer. This will count down with each tap.
Jesse Hollington / Digital Trends
Step 4: Enter your PIN when prompted. You’ll be returned to the About screen, where you should see a message that You are now a developer.
Jesse Hollington / Digital Trends
Step 5: Select the arrow in the top-left corner or swipe right to return to the previous settings menu.
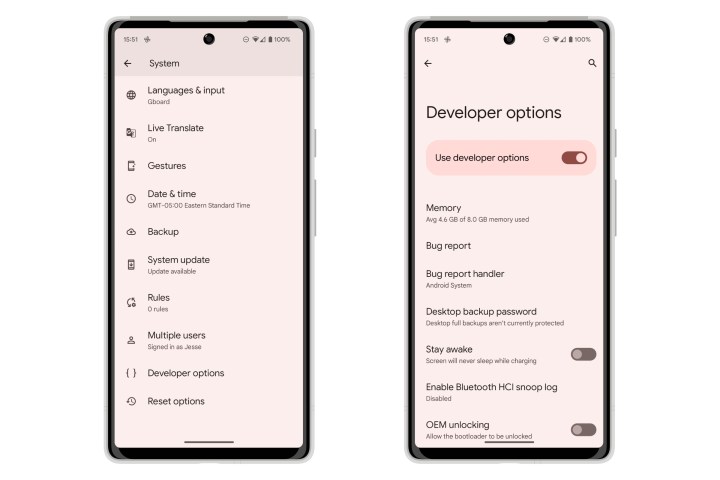
Step 6: Select System.
Jesse Hollington / Digital Trends
Step 7: Select Developer options.
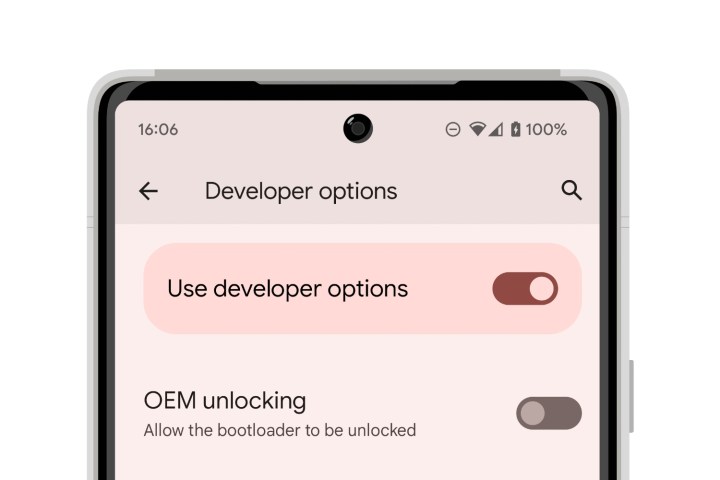
Step 8: Locate the OEM unlocking option and select the switch to toggle it on.
Jesse Hollington / Digital Trends
Step 9: When prompted, enter your PIN.
Jesse Hollington / Digital Trends
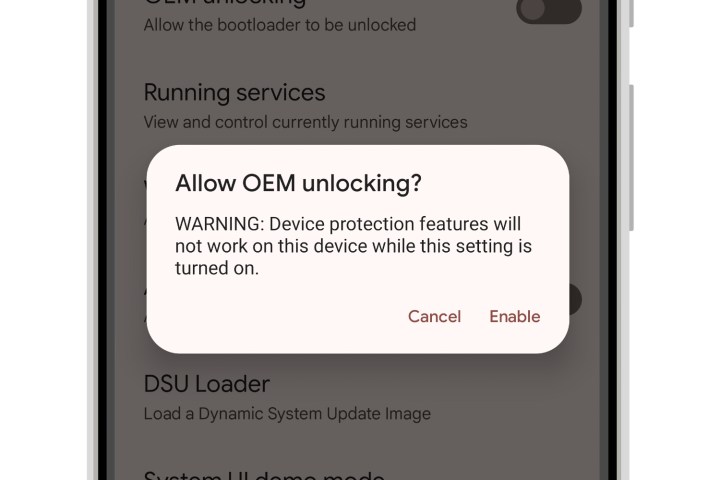
Step 10: From the pop-up dialogue that appears, select Enable to confirm.
Step 11: Locate the USB debugging option and select the switch to toggle it on.

Jesse Hollington / Digital Trends
Step 12: From the pop-up dialogue that appears, select OK to confirm.

Jesse Hollington / Digital Trends
Jesse Hollington / Digital Trends
How to install Android 14 using the Android Flash Tool
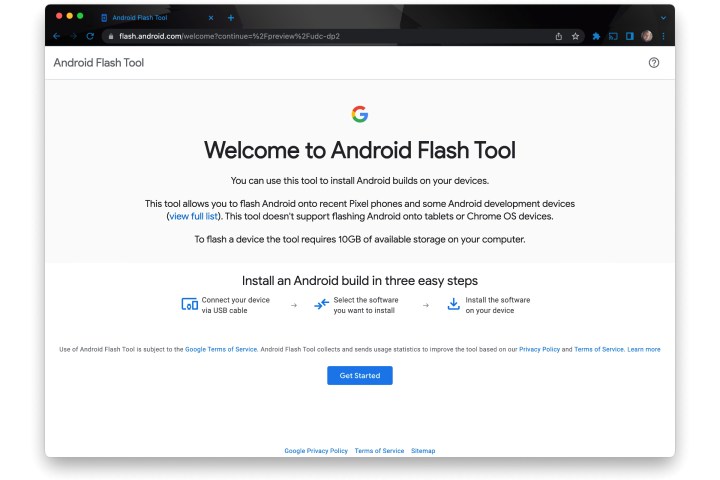
Once your Pixel’s bootloader has been unlocked and it’s ready to accept USB transfers, you can install the Android 14 beta. While there are a few ways to do this, the simplest is to use Google’s Android Flash Tool, which can be run directly in your Chrome browser.
Step 1: Open the Android Flash Tool by visiting flash.android.com in Google Chrome.
Step 2: Select Get Started.
Step 3: If you’re using Chrome on Windows, you may also be prompted to download and install an Android USB Driver. Select Download Android USB Driver and follow the instructions or choose Already installed if you’re sure you’ve done this before.
Jesse Hollington / Digital Trends
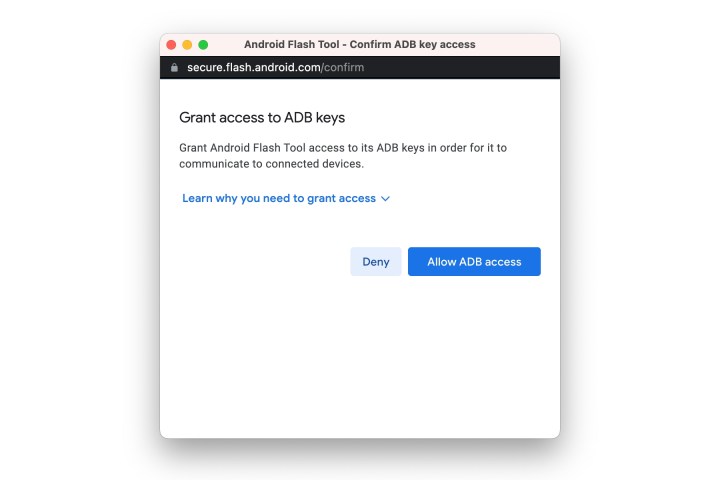
Step 4: A pop-up window should appear next, asking you to grant access to ADB keys. Select Allow ADB access to continue.
If this pop-up doesn’t appear, check your Chrome settings to ensure you’re not blocking pop-ups for flash.android.com and select the Show Dialogue Again button.
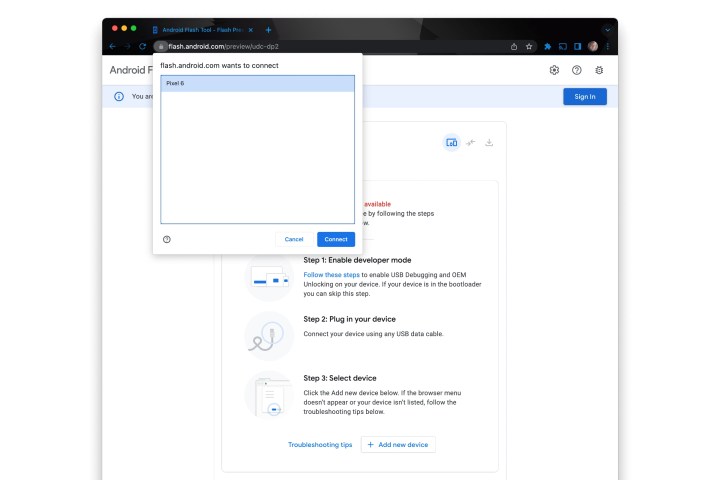
Step 5: Once you arrive at the Installing build screen, plug your Pixel into your computer using a compatible USB-C cable and select Add new device.
Jesse Hollington / Digital Trends
Step 6: Choose your Pixel from the list of devices and select Connect.

Jesse Hollington / Digital Trends
Step 7: On your Pixel, authorize the connection by checking the Always allow from this computer option and selecting Allow.
The Android Flash Tool on your computer should update to show your Pixel as connected.
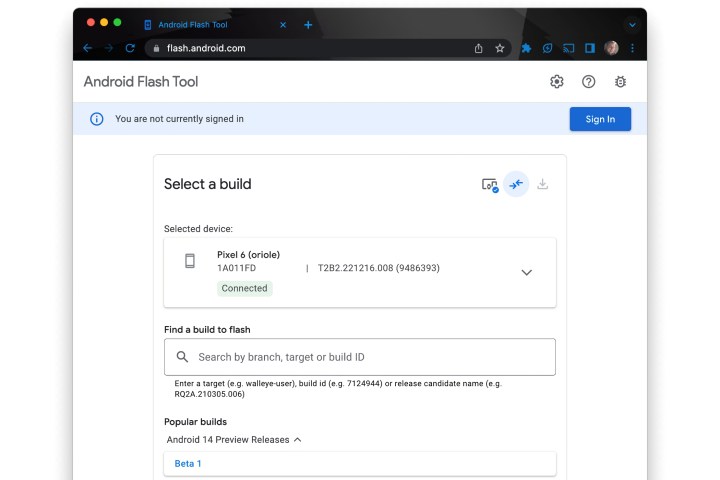
Step 8: Select the first Beta 1 option under Android 14 Preview Releases.
Note the default options: Wipe, Lock, and Force Flash. You can modify these by clicking the pencil tool, which, in theory, should allow you to install the Android 14 Beta without wiping your device. We don’t recommend counting on that, though.
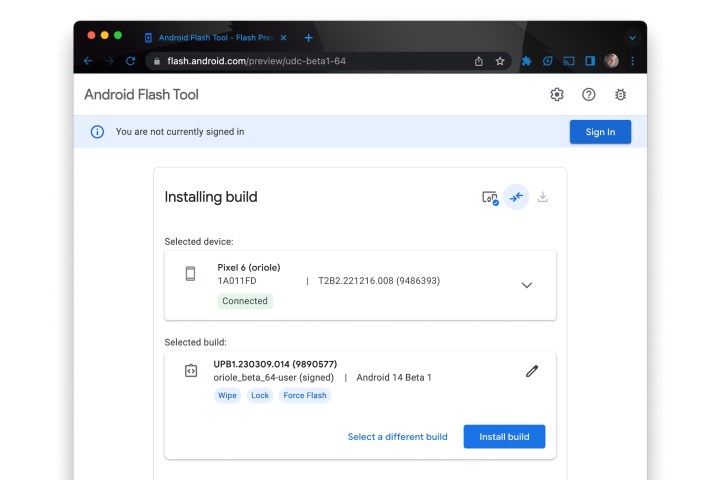
Step 9: Select Install build to begin installing the Android 14 Beta.
The installation process will take some time to complete, so grab a coffee and give it a while. Once it’s finished, your Pixel should automatically reboot and show the Android 14 welcome screen.
While early Android betas should be more stable than the extremely early developer previews, they’re still not fully baked, so think twice before taking the plunge, especially during the first few weeks. You’re almost certain to run into unexpected behavior, new features that aren’t quite finished, and will probably take a noticeably hit on battery life, too.
Fortunately, installing the Android 14 Beta isn’t a one-way trip. If you decide that things aren’t going as well as you hoped, you can return to the warmer and safer embrace of Android 13, but you’ll need to wipe your device to do so.
If you enrolled your device to receive OTA betas, you can return to the Android Beta for Pixel page and unenroll your device by selecting Opt out — this will send you another OTA update for the last stable release of Android 13. However, installing that OTA update will wipe your device, forcing you to either start fresh or restore from the last backup made using Android 13.
Alternatively, you can use the steps for the Android Flash Tool described above and choose the Back to public option to factory reset your device to the latest public build.
And if you don’t want to mess with the betas at all yet, you can also just wait to see when the final release of Android 14 is coming to your phone.
Editors’ Recommendations
Credit: Source link


Comments are closed.