What should you do when you don’t need to watch a video, but instead just need to listen to the audio? In these cases, you want the portability and storage offered in an MP3. We are going to show you how to easily convert an MP4 video file to an MP3.
There are a variety of free file converters you can use directly in your browser or download to your desktop. Read on to learn about our favorites and our simple instructions on how to convert your MP4 files using these free tools.
Convert an MP4 to an MP3 using CloudConvert
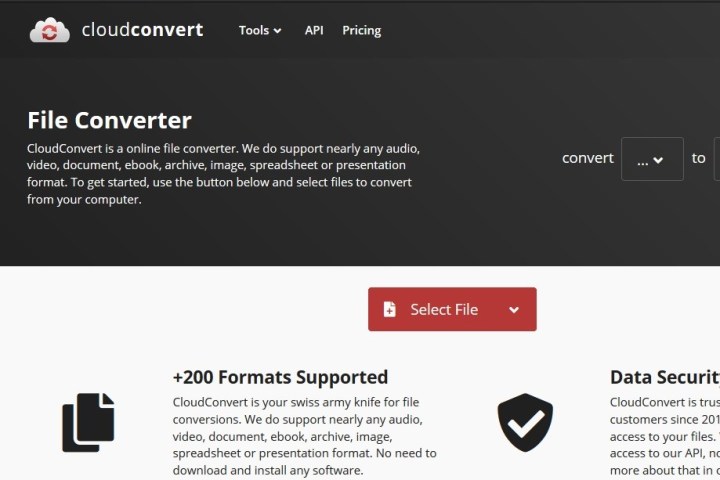
The CloudConvert homepage is the best place to start. CloudConvert is an intuitive, cloud-based service that provides a stand-alone option that requires little more than an internet connection and your file. It’s free, requires no additional software to run, and supports more than 200 formats — most importantly in our case, MP4 to MP3.
While the resulting audio quality is great, as is the conversion speed, a free account only allows up to 25 free conversions per day. However, CloudConvert should suit your needs if your only need to convert a few, small files per day.
Step 1: Go to the CloudConvert website and select the files you want to convert. Choose the Select file button in the middle of the page and select the video files you wish to convert to MP3. A pop-up window will appear where you can locate or search for the desired files on your computer.
If you click on the Drop down arrow icon to the right of Select file, you can also choose a file from a URL or from your Dropbox, Google Drive, or OneDrive. Note that you’ll need to sign in to your cloud storage account via the CloudConvert site to access your cloud storage files. Doing so may automatically create a free CloudConvert account.
Once your files are selected, choose the Open button in the lower-right corner of the pop-up window to add your files to the conversion queue.

screenshot / Digital Trends
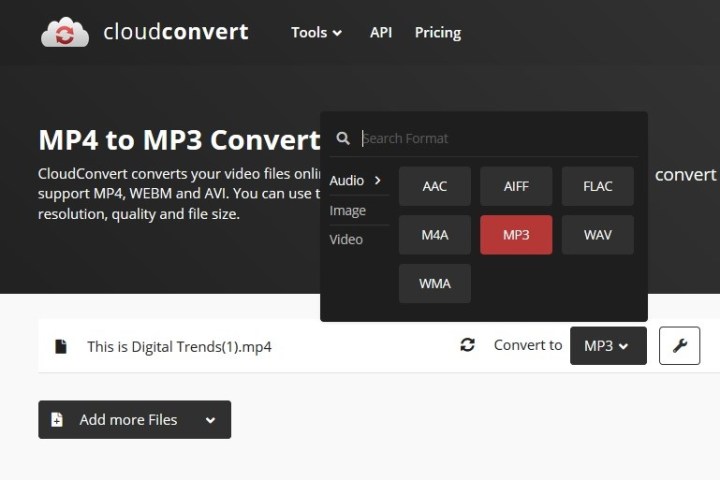
Step 2: Choose your output format. Select the Drop down arrow button that appears after uploading your MP4 file, then select Audio followed by MP3 from the drop-down list.
Choose the Wrench icon located directly beside the file if you wish to fine-tune the audio bit rate, audio Qscale, volume, or length. The latter is an incredibly handy tool if your video has an introduction or ending with undesired audio. When finished, select the red Okay button.

screenshot / Digital Trends
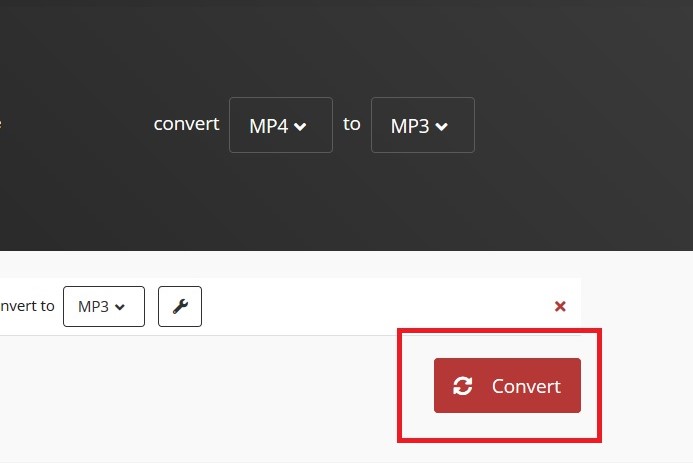
Step 3: Select the red Convert button on the right side of the page when you’ve finished setting your desired output preferences. A gray-and-yellow bar will appear indicating the conversion’s current status, along with a cancellation button (a red X next to the gray-and-yellow bar) should you change your mind for whatever reason. Afterward, wait for the conversion to complete.

screenshot / Digital Trends
Step 4: It may take some time, but CloudConvert will notify you when your conversion is finished. (A preview of your MP3 track may automatically play so you can hear it before deciding to download it.) Then just select the green Download button to save it to your computer. Now that you ripped your audio, you need a decent MP3 player to play it on. These are our favorites.

screenshot / Digital Trends
Alternative: Any Video Converter (Windows and macOS)
You can use our favorite video converter, Any Video Converter, if you want to convert files on your computer.
By using this converter, users can convert MP4 files into a variety of formats, including the highly portable MP3 format. This converter is our top choice due to its high speeds, good video and audio quality, and its wide range of supported devices. AVC also offers advanced options, including cropping and trimming audio files or combining different videos.
Step 1: The AVC website offers a free edition of the Any Video Converter software that you can download directly. You can start the download process with a simple click of the Download now button. After the installation, open the app and select the Format convert option on the main screen.

screenshot/Anita George / Digital Trends
Step 2: A pop-up window will appear where you can select the MP4 file as the input.
Once your MP4 video is added as the input, look for the header Output options on the right side of the screen. Under this header, select the Video format drop down menu. From the menu that appears, choose MP3 audio.
Adjust the audio options that appear below as you see fit, then select the blue Start button in the bottom right corner of the screen.
Step 3: When your conversion is complete, select the View output file button that appears. (You don’t need to upgrade to Pro to do this, just ignore the rest of that window.)
Your new MP3 file’s save location will then automatically open so you can locate your new file on your device right away.
Editors’ Recommendations
Credit: Source link


Comments are closed.